
In the last paragraph, a cube was drawn by entering the coordinates of its corners, but it was not ’constructed’. If you drag a corner of the cube, the cube will fall apart.
Therefore in the following paragraph a ’real’ construction shall be made: a regular tetrahedron.
Conceptual design:
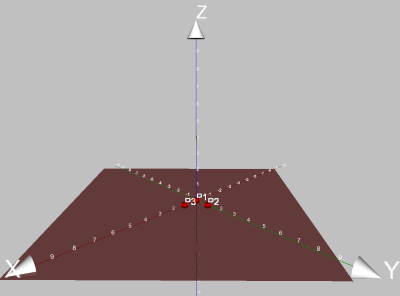
To construct a regular triange, a construction ’in the plane’ has to be made. Thus it is advisable to construct a plane first. You can use the xy-plane:
The result should look like this:
Now rotate the scene to look at the plane from above (use left drag, but do not click on the plane directly or use ALT).
Now you need two points in the plane to get the first two corners of the regular triangle.
You get a point in a plane by selecting the plane and then pressing the point-button.
 Alternatively you can select the plane and then double-right-click into the scene.
If you want to double-right-click on the plane, you will have to press ALT to avoid a
context menu popping up. The third possibility: Select the plane and press ALT-p for
point.
Alternatively you can select the plane and then double-right-click into the scene.
If you want to double-right-click on the plane, you will have to press ALT to avoid a
context menu popping up. The third possibility: Select the plane and press ALT-p for
point.
Now you can adjust the points to your liking. The result should look like this:
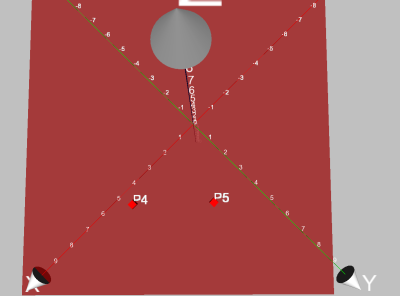
Now it is time to think about how to construct a regular triangle: Draw a circle around P1 through P2 and one around P2 through P1, the intersection point is the missing third point of the triangle.
But if you select P1 and P2 and press circle, no circle is shown. A menu pops up showing that no suitable objects for a circle are selected. The explanation: In the plane a circle is given by its center and a point on the circle. In space this is not possible: The circle could rotate around the line through the two points. So it is necessary to give the program information about the plane the circle should lie in. And indeed, if you add the plane to your selection, pressing the circle-symbol results in the desired circle. You could have chosen ’Circle by midpoint, point and plane’ from the popup-menu instead and have selected the corresponding objects afterwards.
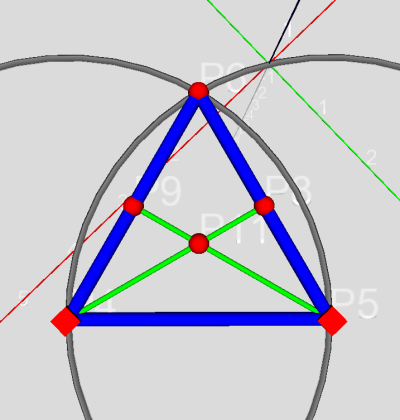
After constructing the other circle too, you should get a picture like the following:

Selecting the circles and pressing ?point? results in the two intersections of the circles.
You can safely delete one of the points, as we need only one for the regular triangle. Furthermore you should hide the circles.
To get the sides of the triangle the points must be connected with segments. The quickest way to do so is to mark all three points and then press segment. You get a closed ring of segments. 2
Now you need the center of the triangle. As our triangle is regular there are several possibilities now. The easiest:
Now there are two conditions that must be matched for the tip:
The second condition can be visualized by selecting the midpoint and the plane and pressing the
line-button  - this results in the perpendicular line. The tip must lay somewhere on that line.
3.
- this results in the perpendicular line. The tip must lay somewhere on that line.
3.
Now let´s think about the first condition: All points that have the same distance to P4 as P5 are on the sphere with center P4 through P5. As a result, we construct this sphere by selecting P4 and P5 and then pressing the sphere-button.
Now the point in question is the intersection of the sphere and the perpendicular line that can be constructed by selecting those objects and pressing the point-button.
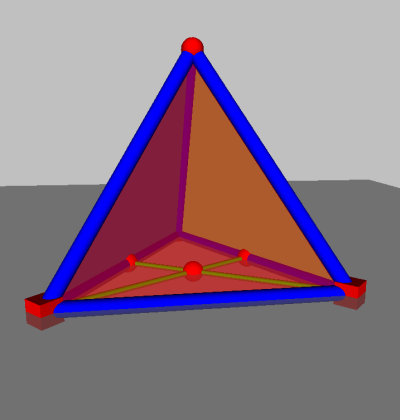
Afterwards you can hide all unnecessary objects, draw the sides and select colors for them. The result should look like this:
If your interests are of purely geometrical nature, you can skip the following paragraph.
If you type ’pyramid’ in Google’s picture-search you get several pictures showing the Pyramids of Gizeh.
One of them shows a free view to one of the pyramids:
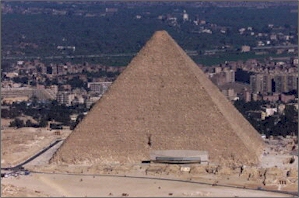
This picture can be used to decorate the sides of our tetrahedron. The following steps are necessary:
In the event that your construction was not saved, you will get an error now: Archimedes Geo3D copies all textures to the directory the construction is saved in. This is done to enable the construction to be copied together with all textures to a different location (relative pathnames are used). If the construction has not been saved before, Archimedes does not know where to put the texture!
If a picture of the same name is already in the constructions directory you will be prompted whether or not it should be overwritten.
If nothing has gone wrong the side with the texture should look like this:
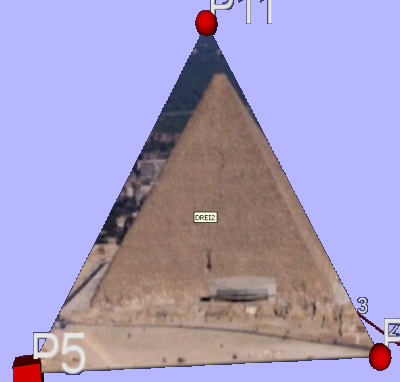
If it does not look like this, check the following possibilities:
Now only the side of the pyramid should appear on the triangle.
To achieve this move the white points that can be seen in the picture on the texture-card.
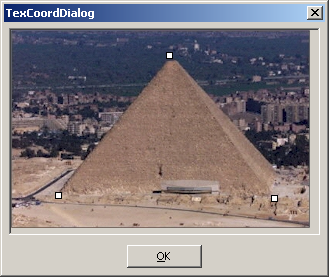
Press OK when finished.
Note: The representation of the texture changes in realtime on the triangle. Thus it is advisable to position the dialogue in a way that allows the triangle to be seen to control the result of changing the texture-coordinates.
Thus you can build your own pyramid and hope, that the Egyptian architects do not rise from their tombs. Of course, the pyramids are not regular tetrahedrons, but have a square base!