4.4 Macro
4.4.1 Mark as given
The ’given objects’ of a construction are those the ’target object’ will be constructed from later. If
you want to use the macro, objects of the same kind as the given objects in the macro must be
selected. Ordering is important.
For examples see the section 1.4.9 about macros and the section 12.1.
-
Changing the given objects:
- All of the new given objects must be selected. Choosing
’Macro - mark as given’ then deletes the old given objects and sets the new ones.
-
Reset the given objects:
- Choose ’Macro - mark as given’ while no object is selected.
Afterwards the list of given objects will be empty.
4.4.2 Recurse on
If you want your macro to be recursive, set the objects to recurse on with this function.
The object-type and order must match the type and order of the given objects. It is possible to
define multiple recursions.
-
Deleting a recursion:
- Double-click on a recursion in the list. Confirm the deletion of the
recursion.
Examples:
-
Approximate the center of gravity recursively:
- Let a triangle be given by its vertices.
Now it is easy to construct a triangle that has the midpoints of the first triangles
segments as vertices.
Now you can construct a ’Midpoint-triangle’ for the resulting triangle again.
Details:
- Construct three free points
- Construct the three segments (mark the three points and press the
’segment’-button)
- Construct the three midpoints (mark two points and press the point-button, you
will get the midpoint)
If you want to define this construction as a macro it would be logical for the vertices of the
first triangle to function as the given points. Consequently, you will have to mark them as
given.
You could start again with the three midpoints. This is your recursion: Mark the three
midpoints and choose ’Macro - recurse on’.
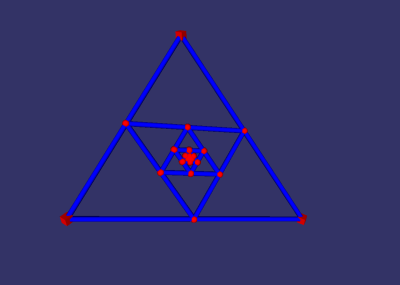
Now you should save the macro, for instance as ’MacroMidpointTriangle.geosave’. Then start
a new construction, construct three points, select them and choose ’Macro - play’. Select the
file you just saved. Now a dialogue appears that lets you enter the number of recursions. Five
would be a good choice.
The result should look like this:
4.4.3 Mark as final
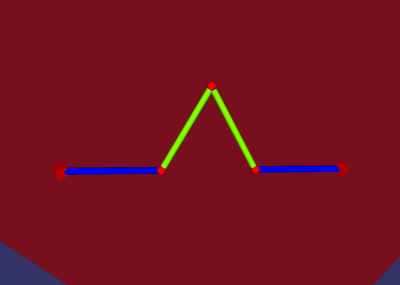
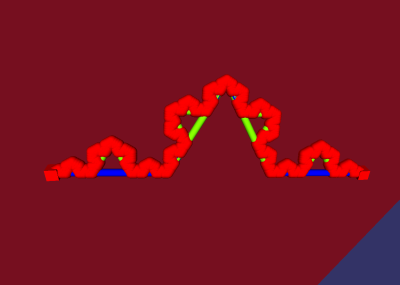
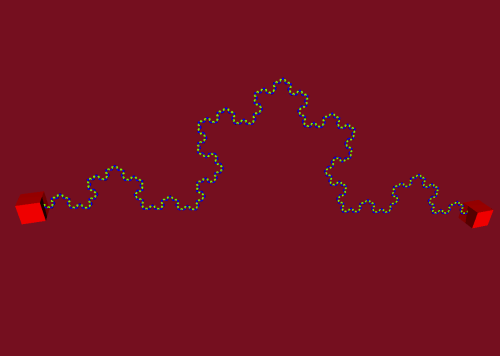
Elements marked as final will only be drawn at the last recursion. Example:
4.4.4 Enter description and help-texts
Here you can enter a description for the macro and comments for each step of the construction, see
the section 12.5 on entering comments.
4.4.5 Play
Plays a macro. If the objects selected in the current construction match the given objects in the
macro exactly it will be played at once. If not, the user will be prompted to select the necessary
objects one after another.
If not, the user is prompted to select the necessary objects one after another (similar to the
commands in the ”New Object”-Menu). If the author of the macro provided helptexts with the
macro they will be displayed. If not, only the types of objects that are required for the macro will
be shown.
In case a construction is chosen that is not a real macro it will simply be pasted into the current
construction (name-clashes will be corrected).
4.4.6 Select a macro-directory
A dialogue for selecting a folder will appear. The selected folder will be used as your macro-folder.
All constructions saved in that folder or subfolders will appear as a menu-entry in the macro-menu.
Subfolders will show as submenus. This enables you to sort your macros by theme. The
macro-folder contained in the program-folder demonstrates this.
This setting is permanent, so you won´t have to select a macro-directory each time you start
the program. In the event that you save additional macros to your macro-folder, you will have to
select ’Macro - Refresh macro directory’ or to restart the program for this to have effect on the
macro-menu.
For Mac- and Linux-users it is necessary to select ”Extras - Settings - Use as preset” to make the
selected macro-directory permanent.